This manicure is one that turned out much different than I expected. I had a lot of plans for it when I started, but my polishes had a mind of their own.
I originally wanted to do a reverse glitter gradient on my middle and ring fingers. But as you can see, that didn't happen. The glitter was harder to manage than I expected because the clear base is so thick. I had a lot of trouble moving the pieces around. They somehow formed into a point / diamond shape that I really liked.
I thought about doing the ring finger with this same design, but decided against it. I wasn't sure I would be able to replicate the shape, and it looked really awesome on the one finger.
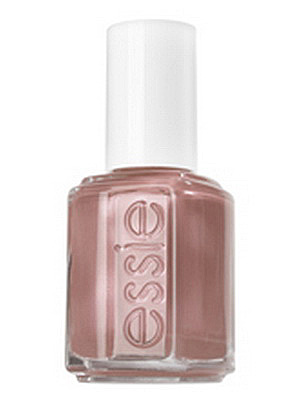
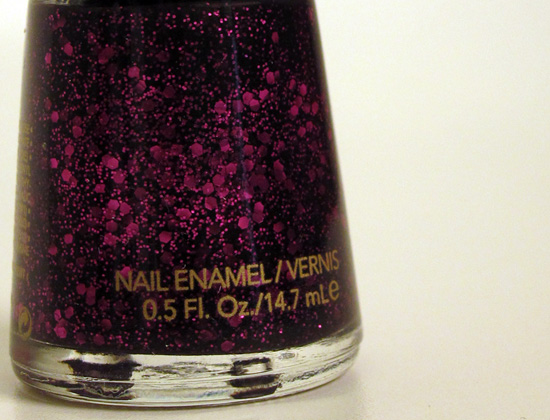
My base color is Essie Play Date. I had been wanting another purple for a while, and this one caught my eye. I used A Cut Above from the Essie Luxe Effects top coat collection as a accent on my middle finger. It has metallic pink hex glitter, as well as some small dots of the same color. Finally, I finished with a top coat of SV.
After a few days, I really wasn't happy with this mani. I didn't like how the purple looked (it was much darker than I expected) and it just seemed wrong. At one point I looked at the color and thought, "It's not Easter. I can't wear this now." I took it off after only three days despite minimal chipping.
I decided that A Cut Above is great if you want to cover your whole nail, but if you want to manipulate it you're out of luck. As for Play Date, I think we need some space. Looking back, I think I was just in a bad mood. I felt extremely stressed while I was wearing and may have taken it out on nail polish. Healthy, right?
Showing posts with label essie. Show all posts
Monday, April 30
Manicure Blues (Or Should I Say Purples?)
Wednesday, April 18
Striped Chic
Last week I received a very special academic award. It's called the Outstanding Undergraduate Scholar Award, and it's a pretty big deal. You have to have at least a 3.85 to even be considered, then faculty recommendations and personal qualities determine whether you get the award. This year, only seventy-five students (my university has just under 15,000 undergraduates) were honored.
Anyway, I was one of those students and I thought that deserved some special nails. I decided to go with a look I've been wanting to do for a while: stripes.
To create this mani all you need is scotch tape. First you paint your base color, which should be the lightest. I used OPI Tutti Fruti Tonga. Let it dry, add a top coat, apply the tape, and paint on another color. My second color was Essie Master Plan, a gray I absolutely adore (thumbs up if you heard that in an Olsen twin's voice).
I am very excited to tell you about the top coat I used. It's called Seche Vite and I've been trying to get my hands on it for months. You know that I've been searching for a good top coat and this is the one that a lot of nail bloggers flock to, and I can see why. I bought two tiny bottles because they were only $2 and the big bottle was $10.
I really like how this mani turned out. It feels young, but sophisticated. I also can't help but think of elephants when I see the pink and gray. I just love elephants (along with cats, of course).
The striping wasn't as hard as I thought it would be. You just have to make sure that you're precise with your tape. Cutting out all of your tape strips ahead of time helps, too. If you want to try this technique, try this tutorial that I used.
Anyway, I was one of those students and I thought that deserved some special nails. I decided to go with a look I've been wanting to do for a while: stripes.
To create this mani all you need is scotch tape. First you paint your base color, which should be the lightest. I used OPI Tutti Fruti Tonga. Let it dry, add a top coat, apply the tape, and paint on another color. My second color was Essie Master Plan, a gray I absolutely adore (thumbs up if you heard that in an Olsen twin's voice).
I am very excited to tell you about the top coat I used. It's called Seche Vite and I've been trying to get my hands on it for months. You know that I've been searching for a good top coat and this is the one that a lot of nail bloggers flock to, and I can see why. I bought two tiny bottles because they were only $2 and the big bottle was $10.
I really like how this mani turned out. It feels young, but sophisticated. I also can't help but think of elephants when I see the pink and gray. I just love elephants (along with cats, of course).
The striping wasn't as hard as I thought it would be. You just have to make sure that you're precise with your tape. Cutting out all of your tape strips ahead of time helps, too. If you want to try this technique, try this tutorial that I used.
Labels:
essie,
manicure challenge,
nail art,
nail polish,
OPI
Wednesday, March 21
A Scandalous Matte Manicure
Today's mani may not be seasonally appropriate (I was watching Harry Potter at the time), but it is very cool. It was also one of the simplest ones I've done in a long time. It took me less than an hour to do my nails!
For my base color I chose Sally Hansen's Xtreme Wear in Black Out. This polish is super cheap, but amazingly pigmented. I only needed one coat. Then I layered on one coat (yes, one!) of Revlon's Scandalous. Then to finish the look, I added a coat of Essie's Matte About You. That's it! Just three easy coats!
Scandalous is an amazing little jelly. It contains magenta micro glitter and hex glitter. I felt like the formula was much better than Whimsical, even though they're essentially the same. I also wasn't worried about getting as much glitter on my nails as possible, although the glitter did come out easier this time.
My nails looked cool with pink-purple glitter over black, but it felt a bit ordinary. I added the matte top coat and oh my goodness, instant love. It made the black look like a chalkboard or tar, and then the glitter took on a whole new look. It gave them a bit of a galaxy feel, which I've been wanting to try.
Would you wear this polish? What other colors should I layer Scandalous over?
For my base color I chose Sally Hansen's Xtreme Wear in Black Out. This polish is super cheap, but amazingly pigmented. I only needed one coat. Then I layered on one coat (yes, one!) of Revlon's Scandalous. Then to finish the look, I added a coat of Essie's Matte About You. That's it! Just three easy coats!
Scandalous is an amazing little jelly. It contains magenta micro glitter and hex glitter. I felt like the formula was much better than Whimsical, even though they're essentially the same. I also wasn't worried about getting as much glitter on my nails as possible, although the glitter did come out easier this time.
My nails looked cool with pink-purple glitter over black, but it felt a bit ordinary. I added the matte top coat and oh my goodness, instant love. It made the black look like a chalkboard or tar, and then the glitter took on a whole new look. It gave them a bit of a galaxy feel, which I've been wanting to try.
Would you wear this polish? What other colors should I layer Scandalous over?
Saturday, March 17
Miss March
Labels:
Antonio Marras,
Chan Luu,
essie,
fashion,
FOSSIL,
Monsoon,
polyvore,
print dresses,
style
Friday, March 16
Metallic Dots
I did my very first manicure using a dotting tool, and I have to say, I'm pretty happy. I am also proud that I came up with this idea on my own, instead of looking at other manis for inspiration.
The base color is OPI's I Have a Herring Problem, from their Holland collection. Let me tell you, it is so gorgeous! It's a lovely blue-gray with little, itty-bitty shimmers in it. For the dots I used Sally Hansen's Time to Shine, a bronzey-gold, which I also adore.
To make the dots I actually used a sewing pin! I mean, why buy a professional dotting tool when you have things around your house that do the same thing? I just rubbed the rounded end of the pin on the brush, tapped the excess polish onto a piece of paper, and then pressed the polished pin to my nail.
For the design I did four dots in a vertical line on each nail, with five dots on the thumbs. Since I'm new at dotting, they're not all equal, but I still like it. They ended up reminding of jeans because the blue looked like denim with brass buttons. Talk about a fashion mani!
The base color is OPI's I Have a Herring Problem, from their Holland collection. Let me tell you, it is so gorgeous! It's a lovely blue-gray with little, itty-bitty shimmers in it. For the dots I used Sally Hansen's Time to Shine, a bronzey-gold, which I also adore.
To make the dots I actually used a sewing pin! I mean, why buy a professional dotting tool when you have things around your house that do the same thing? I just rubbed the rounded end of the pin on the brush, tapped the excess polish onto a piece of paper, and then pressed the polished pin to my nail.
For the design I did four dots in a vertical line on each nail, with five dots on the thumbs. Since I'm new at dotting, they're not all equal, but I still like it. They ended up reminding of jeans because the blue looked like denim with brass buttons. Talk about a fashion mani!
Monday, March 5
Yay! Essie's Spring Collection
Spring is my favorite season. Essie is my favorite brand of nail polish. Therefore, it was pretty much a given that I would love their Spring Collection which is inspired by the "self-made woman." I do.
Are you ready for the colors? Here they are from left to right:
Navigate Her - a light, bright green
A Crewed Interest - a luminous peach shade
To Buy Or Not To Buy -a lavender with shimmer
Tour de Finance - a fuchsia with shimmer
Ole Caliente - a red-orange with pink undertone
Orange, It's Obvious! -a bright orange
I saw these shades in the store, and trust me, they are gorgeous. My favorites are Navigate Her (this green is going to be so popular!), Ole Caliente, and A Crewed Interest is really growing on me. Which shades do you like?
Image Source
Are you ready for the colors? Here they are from left to right:
Navigate Her - a light, bright green
A Crewed Interest - a luminous peach shade
To Buy Or Not To Buy -a lavender with shimmer
Tour de Finance - a fuchsia with shimmer
Ole Caliente - a red-orange with pink undertone
Orange, It's Obvious! -a bright orange
I saw these shades in the store, and trust me, they are gorgeous. My favorites are Navigate Her (this green is going to be so popular!), Ole Caliente, and A Crewed Interest is really growing on me. Which shades do you like?
Image Source
Saturday, March 3
Essie's Buy Me a Cameo
I bought this polish the other day, and despite having about seven polishes in line ahead of it, I decided to try it out. I absolutely love it!
Buy Me a Cameo is "a frosted satin mocha," but when on it has a champagne feel. It's soft and elegant, and so pretty. I keep looking at my nails and thinking "I could wear this to a wedding."
Consider me on board with the nude nails trend. There's nothing better than buying a new polish and having it instantly become a favorite.
Buy Me a Cameo is "a frosted satin mocha," but when on it has a champagne feel. It's soft and elegant, and so pretty. I keep looking at my nails and thinking "I could wear this to a wedding."
Consider me on board with the nude nails trend. There's nothing better than buying a new polish and having it instantly become a favorite.
Wednesday, February 29
New Polishes!
I stopped by Rite Aid today to pick up a prescription and hair spray. They were out of hair spray, so I got nail polish instead!
The first is Buy Me a Cameo by Essie. It's a "frosted satin mocha" that is very beautiful and sophisticated. It has little tiny multicolored shimmers throughout. I really cannot stop looking at it. It has a hint of champagne and nude, which keeps it away from old lady territory (not that I would have a problem with that). I think what I love the most is that it really does look like satin.
I was going to be good and stop there, but then I noticed that Revlon polishes were 75% off! Naturally, I couldn't resist when I saw Scandalous. It's a black jelly with purple hex glitter pieces and tiny glitters. Unfortunately, it's another Deborah Lippmann dupe (Facets of Fuchsia), so I have buyer's guilt again. However, this polish is so gorgeous it's having trouble sticking to my conscious.
I'll try to wear these as soon as possible!
Image Source Image Source
The first is Buy Me a Cameo by Essie. It's a "frosted satin mocha" that is very beautiful and sophisticated. It has little tiny multicolored shimmers throughout. I really cannot stop looking at it. It has a hint of champagne and nude, which keeps it away from old lady territory (not that I would have a problem with that). I think what I love the most is that it really does look like satin.
I was going to be good and stop there, but then I noticed that Revlon polishes were 75% off! Naturally, I couldn't resist when I saw Scandalous. It's a black jelly with purple hex glitter pieces and tiny glitters. Unfortunately, it's another Deborah Lippmann dupe (Facets of Fuchsia), so I have buyer's guilt again. However, this polish is so gorgeous it's having trouble sticking to my conscious.
I'll try to wear these as soon as possible!
Image Source Image Source
Saturday, February 18
Manicure Challenge: Reverse Manicure
I did this a while ago, but I never posted it even though I absolutely love this look. Better late than never!
I love this look because the dark color, reminiscent of a jewel tone with sparkles is perfect for winter. Have you done the reverse manicure? What are your favorite color combinations?
A lot of people like to use black for their half-moon reverse manicure, which is similar to how the trend started in the 1930s. I decided to use a silver glitter because hey, who doesn’t love glitter? The base is Essie Smokin’Hot. While Essie’s website says the color is a “stone-cold fox gray” I’m pretty sure it’s purple.
To create the half-moons, I used the thin Kiss Nail Artist brush to draw the half circle and then filled it in. I've seen people use paper reinforcers (you know, those stickers that you place on three-hole punched paper) to make the half moons, but that seemed more difficult for me. Besides, isn’t it more fun to say you did it all by yourself? I love this look because the dark color, reminiscent of a jewel tone with sparkles is perfect for winter. Have you done the reverse manicure? What are your favorite color combinations?
Labels:
essie,
kiss nail artist,
manicure challenge,
nail art
Saturday, February 11
Nail Polish Shopping Spree!
What started out as a quick trip to Ulta for a new top coat turned into a polish extravaganza. Upon realizing that said top coat was out of stock, I proceeded to buy five nail polishes.
The first thing I grabbed was Essie's Matte About You. I've been lusting over this top coat that has the ability to turn glossy nails matte with a single coat.
Next, I looked through the whites. My Sally Hansen Insti-Dri White separated beyond repair, so I needed a new one. I chose OPI's Alpine Snow, which is a straight up pure white.
I Have a Herring Problem is my favorite of the polishes I got. This dusty blue with gold and silver shimmer is from OPI's Holland Collection. It's so pretty!
I wanted a nude color (to hop on the Spring trend), but all of the true nudes looked weird against my fair skin. I ended up going with OPI's Bubble Bath. It has just enough pink to compliment my skin tone.
Finally, I grabbed my first Zoya in years. Edyta is a sparkly, shimmery olive green with a metallic finish. It has itsy bitsy flecks of gold, orange, yellow, and blue. I'll probably break it out during March.
Which one should I try first?!
The first thing I grabbed was Essie's Matte About You. I've been lusting over this top coat that has the ability to turn glossy nails matte with a single coat.
Next, I looked through the whites. My Sally Hansen Insti-Dri White separated beyond repair, so I needed a new one. I chose OPI's Alpine Snow, which is a straight up pure white.
I Have a Herring Problem is my favorite of the polishes I got. This dusty blue with gold and silver shimmer is from OPI's Holland Collection. It's so pretty!
I wanted a nude color (to hop on the Spring trend), but all of the true nudes looked weird against my fair skin. I ended up going with OPI's Bubble Bath. It has just enough pink to compliment my skin tone.
Finally, I grabbed my first Zoya in years. Edyta is a sparkly, shimmery olive green with a metallic finish. It has itsy bitsy flecks of gold, orange, yellow, and blue. I'll probably break it out during March.
Which one should I try first?!
Tuesday, February 7
Sparkle Rays Challenge (Finally!)
Two weeks ago I presented my next manicure challenge, the sparkle rays. Then my nails broke down to stubs and I had to cancel. They grew back to a sad, but acceptable length and I was finally ready to do this manicure.
For my base color, I used two coats of Essie's Dive Bar. This is an interesting polish to say the least. Essie describes it as "a mysterious blackest blue with shimmer," but in the bottle you can pick up greens and purples so that it almost looks like a holo. It's kind of like a mermaid got caught in an oil spill.
However, I found that once I put it on all I saw was black. Now that it's dry I can see some of the blue-green when it's reflected in the light, but not much. I'll have to try it on it's own again later.
For the designs, I took my Kiss Nail Artist in the silver glitter and painted easy lines. I started in the middle of the base and pulled out each of the various directions. I did each nail in sections.
To finish, I put on two coats of Sally Hansen's Hard As Nails Strengthening Top Coat. Overall, I like this nail art. It's a great way to liven up your winter nails without going bright. The design was also very simple and easy, but the effect is awesome.
Image Source
For my base color, I used two coats of Essie's Dive Bar. This is an interesting polish to say the least. Essie describes it as "a mysterious blackest blue with shimmer," but in the bottle you can pick up greens and purples so that it almost looks like a holo. It's kind of like a mermaid got caught in an oil spill.
However, I found that once I put it on all I saw was black. Now that it's dry I can see some of the blue-green when it's reflected in the light, but not much. I'll have to try it on it's own again later.
For the designs, I took my Kiss Nail Artist in the silver glitter and painted easy lines. I started in the middle of the base and pulled out each of the various directions. I did each nail in sections.
To finish, I put on two coats of Sally Hansen's Hard As Nails Strengthening Top Coat. Overall, I like this nail art. It's a great way to liven up your winter nails without going bright. The design was also very simple and easy, but the effect is awesome.
Image Source
Labels:
essie,
kiss nail artist,
manicure challenge,
nail art,
nail polish
Friday, January 27
Someone Go Buy Me This!
This beautiful nail polish is Go Overboard. Essie describes it as "a limitless sea blue," and I want it bad. I know it's a bit summer-y for January, but it's okay, I promise. Please, it's only $8 and I'll love you forever.
Image Source
Image Source
Thursday, January 26
Reader Manicure Challenge
We have another reader response to a manicure challenge! Check out Katie's glitter gradient!
She used Rimmel London French Manicure Pro in French Rose for her base and Essie's A Cut Above for her glitter. I recently purchased A Cut Above myself, and this makes me very excited to use it. You can check out Katie on her blog The Polish Project.
Image Source
She used Rimmel London French Manicure Pro in French Rose for her base and Essie's A Cut Above for her glitter. I recently purchased A Cut Above myself, and this makes me very excited to use it. You can check out Katie on her blog The Polish Project.
Image Source
Monday, January 23
Polish, S'il Vous Plait
While flipping through my sister's latest Brides magazine, I saw an ad for Essie Mademoiselle. It's a soft, sheer pink, and totally cute.
I tend to go for bold colors, but there's nothing wrong with have a nice stash of soft colors, too. That's why Mademoiselle is now on my lust list. Also good for formal occasions!
Image Source
I tend to go for bold colors, but there's nothing wrong with have a nice stash of soft colors, too. That's why Mademoiselle is now on my lust list. Also good for formal occasions!
Image Source
Saturday, January 21
Simple Mickey Mouse Nails
As you may have noticed, there was no manicure challenge post this week. Instead of attempting someone else's nail art, I decided to do my own, themed with my trip. I knew there was no way I could paint characters on my nails like some people. That's how I wound up with my own, simple, but cute, design. I present my Mickey Mouse Nails!
I started out with two coats of Essie Lilacism on all of my nails but one. It's a super light and creamy purple, very innocent. I usually like to retire this one for winter, but because Florida is warm, I decided to break it out.
On my ring fingers, I did two coats of a polish I picked up at Delia's a while back. It doesn't have a name, but in the bottle it looks like a light periwinkle. But on, it's a deeper purple.
Now onto the nail art. I took my white Kiss Nail Artist (can you tell I LOVE this stuff?) and tried to paint a circle in the middle of my nail, down towards the free edge, and fill it in. It was hard! As it turns out, these brushes are much better at painting lines. For the ears and other nail, I did paint dots/drops and expanded them.
I then finished off with a top coat of Sally Hansen Advanced Hard as Nails Nylon + Retinol Strengthener. I don't really have pictures because I didn't have time to do a clean up. I only have a single digit number of hours before I leave.
Here's hoping I can show my nails off to someone in the park!
I started out with two coats of Essie Lilacism on all of my nails but one. It's a super light and creamy purple, very innocent. I usually like to retire this one for winter, but because Florida is warm, I decided to break it out.
On my ring fingers, I did two coats of a polish I picked up at Delia's a while back. It doesn't have a name, but in the bottle it looks like a light periwinkle. But on, it's a deeper purple.
Now onto the nail art. I took my white Kiss Nail Artist (can you tell I LOVE this stuff?) and tried to paint a circle in the middle of my nail, down towards the free edge, and fill it in. It was hard! As it turns out, these brushes are much better at painting lines. For the ears and other nail, I did paint dots/drops and expanded them.
I then finished off with a top coat of Sally Hansen Advanced Hard as Nails Nylon + Retinol Strengthener. I don't really have pictures because I didn't have time to do a clean up. I only have a single digit number of hours before I leave.
Here's hoping I can show my nails off to someone in the park!
Saturday, January 14
Curtain Nails Challenge
My manicure challenge this week was curtain nails. The result was a cute and graphic mani that I cannot stop looking at.
The picture I reference used a seafoam/mint green, I had considered using a similar color combo, until I picked up Essie's Bachelorette Bash. It's a bright fuchsia, hot pink. The color isn't quite matte, but it doesn't shimmer. I suppose that makes it a standard shine. For the design, I used Kiss Nail Artist in black.
I painted on two coats of Bachelorette Bash and let them completely dry. Then, I took the the black and drew a line from the side of my nail, starting the free edge and curving up like the top of a heart to the middle of the nail. I filled it in, and then did the same on the other side.
I finished with two top coats. The first was Nail Tek Quicken and the second was Sally Hansen Insta-Dri Anti Chip Top Coat. I have to say though, I'm not liking either one. Nail Tek is good for building strong nails, but it's lacking here. If anyone can recommend a good top coat that doesn't make the color run, please let me know.
I really have fallen in love with this nail art. It was fairly easy (though using my left hand presenting difficulties as always), and it just looks so sharp. The design almost has a mod feel.
The picture I reference used a seafoam/mint green, I had considered using a similar color combo, until I picked up Essie's Bachelorette Bash. It's a bright fuchsia, hot pink. The color isn't quite matte, but it doesn't shimmer. I suppose that makes it a standard shine. For the design, I used Kiss Nail Artist in black.
I painted on two coats of Bachelorette Bash and let them completely dry. Then, I took the the black and drew a line from the side of my nail, starting the free edge and curving up like the top of a heart to the middle of the nail. I filled it in, and then did the same on the other side.
I finished with two top coats. The first was Nail Tek Quicken and the second was Sally Hansen Insta-Dri Anti Chip Top Coat. I have to say though, I'm not liking either one. Nail Tek is good for building strong nails, but it's lacking here. If anyone can recommend a good top coat that doesn't make the color run, please let me know.
I really have fallen in love with this nail art. It was fairly easy (though using my left hand presenting difficulties as always), and it just looks so sharp. The design almost has a mod feel.
Subscribe to:
Posts (Atom)